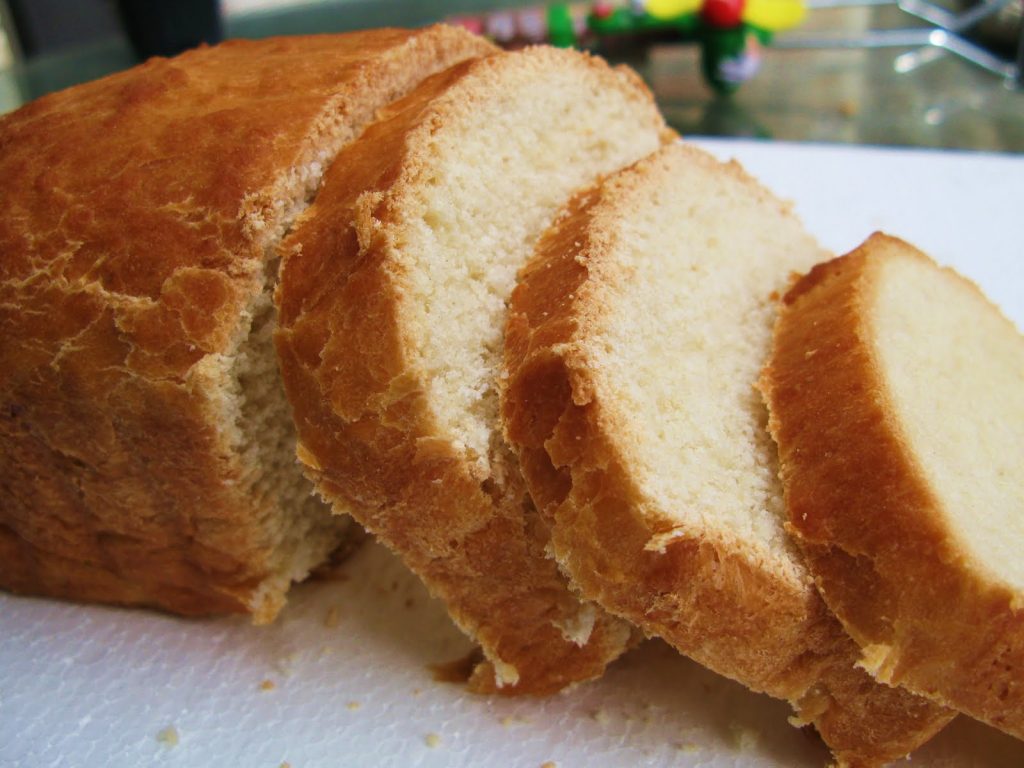
This white bread variation makes a wonderful sandwich bread with just a hint of Amish Friendship Bread sweetness. This recipe and accompanying photos are courtesy Kitchen Friend May Naing from the food blog, Made With Love. Slice it and serve it up with your favorite deli meat, fresh tomatoes, pickles, and bean sprouts!

Sweet White Amish Friendship Bread
This white bread variation makes a wonderful sandwich bread with just a hint of Amish Friendship Bread sweetness.
Ingredients
- 1 cup Amish Friendship Bread Starter
- 1 cup sugar
- ½ cup oil
- 1 teaspoon salt
- 1½ cups warm water
- 6 cups bread flour
Instructions
- In a large bowl, mix all ingredients thoroughly.
- Oil bottom and sides of a large bowl.
- Put dough into bowl and cover lightly.
- Let dough stand overnight at room temperature.
- In the morning, punch dough down four or five times.
- Divide dough into three equal balls.
- Kneed each ball eight to ten times.
- Grease and dust three loaf pans with flour.
- Put dough into pans.
- Brush tops with oil and cover with oiled foil.
- Let stand 4-5 hours or all day.
- Preheat oven to 350° F (177° C).
- Bake 30-40 minutes and cover with foil after lightly browned.
- ENJOY!
Notes
This dough can be mixed with a Kitchen Aid mixer or by hand. If dough has not risen well on the second rise, put a small pan of water on the bottom rack in the oven, heat to 200° F (93° C) and then turn it off. Put dough on top rack for 1-2 hours to get a good rise.
Have you made this?Mention @friendshipbreadkitchen or tag #friendshipbreadkitchen!
>> Have you tried this recipe? Share your best pic with us or leave a comment below and let us know how it worked for you!

what is the size of “3 small loaf pans”
I made this with Amish friendship starter the first time exactly as written, and it was good. Reminiscent of Hawaiian bread but a little drier and denser than I would prefer. I divided it in half and made two loaves. The second time I used regular sourdough starter instead of the Friendship and weighed my flour to exactly 6 cups (720grams), and it was PERFECT. It was still sweet, but not quite as sweet, but lighter and less dry. I baked the two loaves at 375 for 30 minutes. This will be my new bread that I always make. Amazing for sandwiches. Highly recommend. And make sure to weigh your flour. Oh, and brush with melted butter before and after cooking.
Hi Tina! Thanks for sharing your tips, and we’re so glad this recipe worked out for you. Happy baking!
I made two loaves and a batch of rolls. Delicious, nice texture. It did take 7 hours of rising (my oven has a Proof setting) but it was worth it.
Excellent tasting bread. Took about a full day to rise in the pan. Still did not get a full rise but when I baked them they finished rising and came out beautiful.
I have made this bread a three times now and every time it doesn’t rise AT ALL. The taste is amazing. But the texture is dense and chewy. Anyone know a way to get THIS same taste with a light and airy texture?
Has anyone gotten this bread to rise properly? It’s just sitting there in it’s pan and not doing anything. I let it rise overnight, formed it into loaves and put it to rise again. It’s just not rising. It will be in inedible lump if I bake it now.
On a related note: I have followed the instructions to the letter for my starter. The first batch I started turned grey and stank. The second batch smells good and I released air from the bag several times, but it’s just a tan liquid with few bubbles. I letting do it’s thing in a warm kitchen in ziplock bag. Really not happy with it at this point.
Hi Dianna! We’re sorry to hear that the recipe didn’t turn out for you. Every kitchen and every starter are different, so there can be a lot of different variables as to why the dough isn’t rising or if you’re starter isn’t as active as it should be! This might help with some possible issues: https://www.friendshipbreadkitchen.com/faqs/
If you do not wish to bake all three loaves, can you freeze the dough for later baking? And if so, is there anything you need to do to the frozen dough before baking it? And About how long should it take to thaw?
I have the same question that I hope someone will answer!
I have only 1 loaf pan so I’m not sure what to do with the rest while the 1 bakes.
Hi Lindsey! For this recipe we’d recommend baking the loaves one by one and freezing the bread instead of freezing the dough.
My first effort didn’t rise overnight so I moved it to a warmer place for the second rise. It did not cook well in the center so I cooked it longer and it burned the bottom. However, it tastes fantastic so I’m going to give it another go. I’ll let you know how this one goes.
This bread is delicious! I baked three loaves today. No, the dough didn’t rise like I expected, but I think it might be because the water was too warm. The loaves were a bit dense, but I am going to be more vigilant about the water temp the next time. Thank you for your recipe! Honestly — this recipe is a keeper!
why can you use a mixer (assuming means the dough hook)? thought only non metallic utensils should be used with starter?
You don’t want to use any raw metal, like uncoated aluminum, but almost every new appliance or baking sheet, etc is nonstick or treated. If you have your grandma’s old baking tins, or baking tins with scratches on them, you’ll see that the starter interacts with the metals and causes discoloration and can affect the taste of the bread. Hope this helps, Marty!
yiu sikdb;t use aluminum. Stainless steel will not react with fermented breads. I have successfully used stainless steel for both traditional sourdough starter and baking as well as AFB.
Can you use a different flour???
Hi Angie! It’s not recommended. You can always experiment, though, and if you end up with good results (or even not so good results), please share so we can all learn!
Tried this recipe, baked for 35 minutes at 350, but there was still uncooked dough in the middle 🙁
Help!
I noticed a similar occurrence when I moved. I’ve made this recipe before without trouble and I think it has to do with oven type, at least in my case. Before when I baked I used a gas oven. Now I have an electric one. I’ve noticed things don’t cook as evenly, so your problem of the middle not cooking may be related. I switch to the very middle rack with electic & that seems to help. You can also try cooking for longer at a slightly lower temp (325 or 300). This has helped me with the same problem. Good Luck!
I have found that I have to take extra care to help this bread rise. It takes twice as long, and I usually place the bowl/loaf pans on a heating pad to keep it going, but it is well worth the wait. I will say that this bread lasts forever! I kept it on the counter in a twist and tie plastic bag and it was good for almost a month! I was floored!
I tried this and I couldn’t ever get it to rise I dunno what I did wrong it tasted good but it was too heavy and dense