UPDATED!
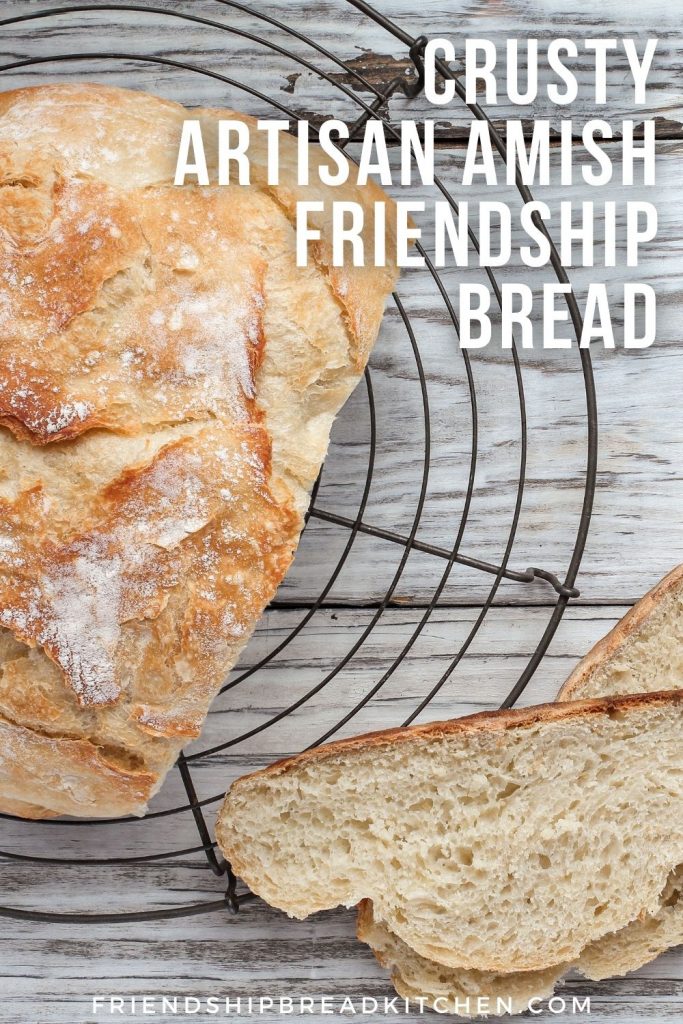
Most people are surprised to discover that one cup of Amish Friendship Bread starter can make a lot more than a couple of loaves of sugar-cinnamon bread. As you’ve probably discovered in my Recipe Box, there are LOTS of things you can make, and this crusty chewy artisan Amish Friendship Bread loaf is one of them.
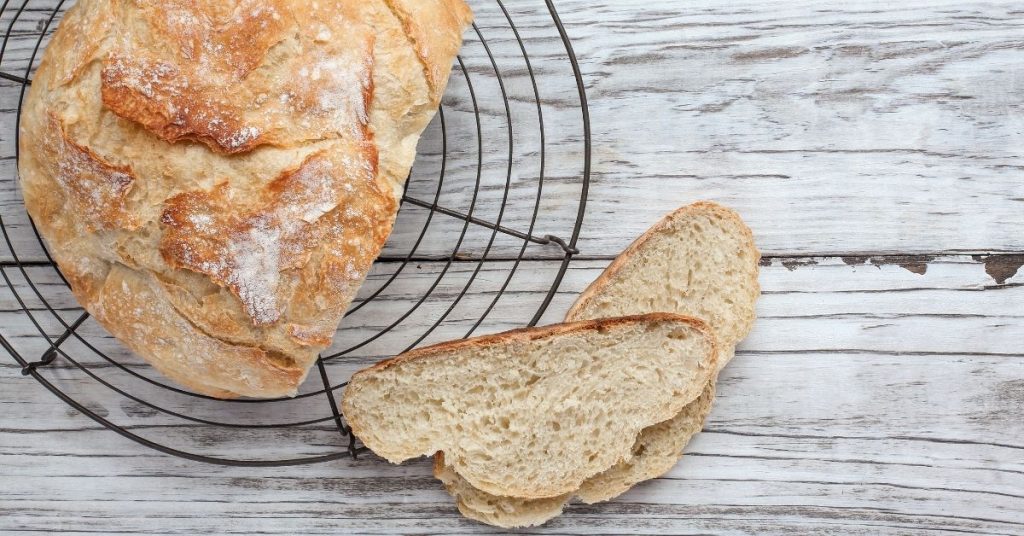
Fresh homemade bread is so much easier to make than people think, and it’s better for you, too, because there aren’t any preservatives and it hasn’t been sitting around for a couple of days or even weeks, waiting for someone to buy it.
Kitchen Friend Heidi Kleyn came up with this wonderful recipe for an artisan loaf (it yields two loaves, actually) that will remind you of your favorite crusty sourdough bread, with that subtle Amish Friendship Bread sweet-sour tang. It’s perfect served alongside this mushroom sausage pasta, too. A special thanks to Kitchen Friend Cathy Wagner List for sharing photos of her bread as well.
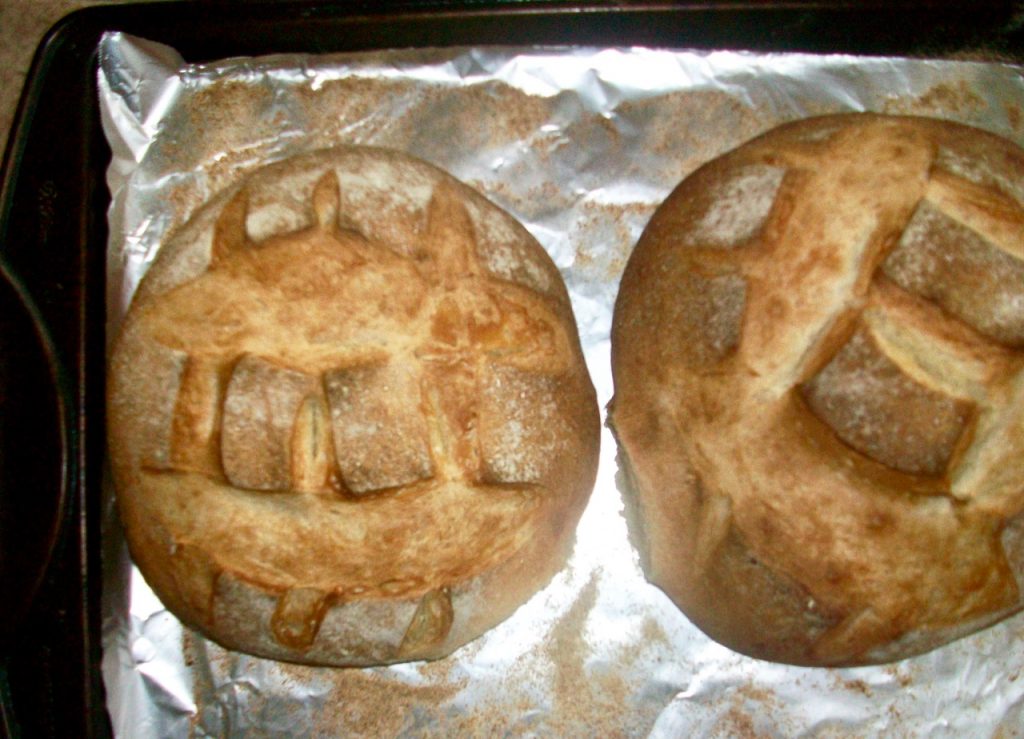
Cathy Wagner List Cathy Wagner List
This recipe uses commercial yeast in addition to the leavening power of your starter. We’re not the only ones — Cook’s Illustrated also adds yeast to sourdough recipes to give their breads a little boost. This is especially helpful if you want to bake bread in the winter or if your kitchen is cool, as traditional starters go dormant in cooler temperatures.
Crusty Artisan Amish Friendship Bread
Ingredients
- 1 cup Amish Friendship Bread Starter
- 1½ cup water lukewarm
- 2 teaspoons yeast
- 1 tablespoon salt
- 5 cups flour plus extra for dusting as needed
- cornmeal as needed
- canola or olive oil to coat for bowl
- spray bottle of water
Instructions
- In a stand mixer bowl with dough hook, add starter.
- Pour water on top and sprinkle on the yeast. Let sit for 5 minutes.
- Add salt and flour, gradually.
- In the stand mixer, blend on low for 5 minutes until dough pulls away from the sides and forms into a nice ball.
- Oil a glass bowl, one large enough to handle a double rising of the dough.
- Place dough in bowl, cover with plastic wrap to let double for approximately 1 1/2 hours.
- Sprinkle flour on work surface and add risen dough.
- Sprinkle a 16″ x 12″ pan with cornmeal.
- Cut dough in half.
- Place dough side-by-side on pan, but not touching.
- Cover and let rise for 1 hour.
- Preheat oven 425° F (218° C).
- After 1 hour, lightly sprinkle dough with flour.
- Cut a tic-tac-toe pattern on top of dough with a very sharp serrated knife.
- Place pan in middle of oven.
- Quickly spray water inside the top of the oven. It’s okay if some water gets on the dough.
- Bake for 25 to 30 minutes. While baking, spray water again after baking 10 minutes and again at 20 minutes.
- Check for doneness: the bread should be brown on top and dark brown on the bottom. Thump the top of the bread to hear an echo, hollow sound. Cool on wire racks
- ENJOY!
Notes
>> Have you tried this recipe? Give the recipe some stars and leave a comment below and let us know how it worked for you!
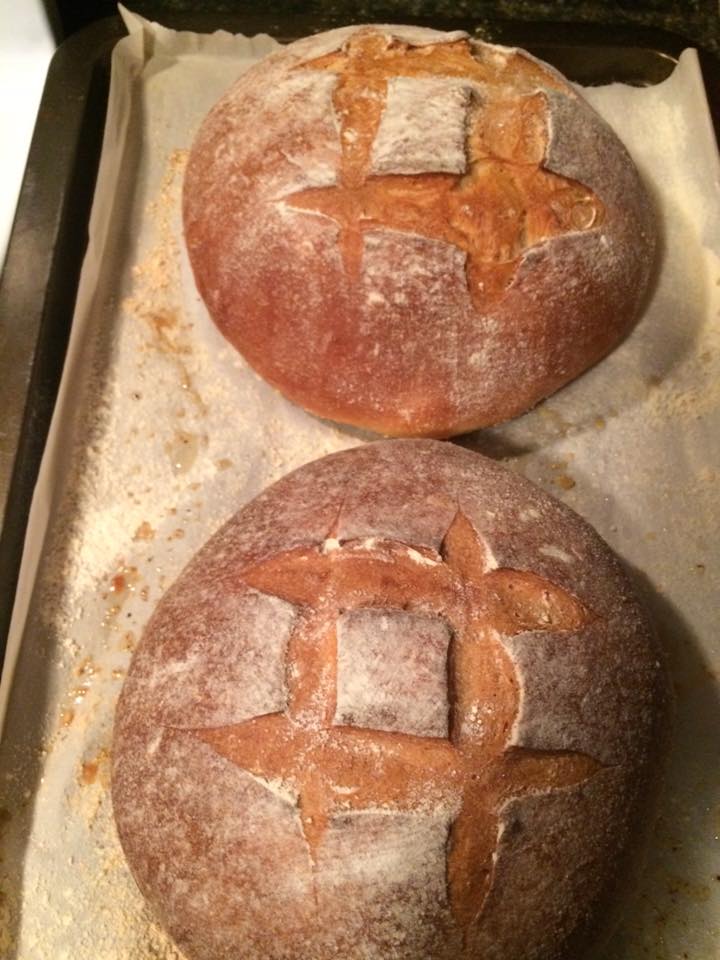
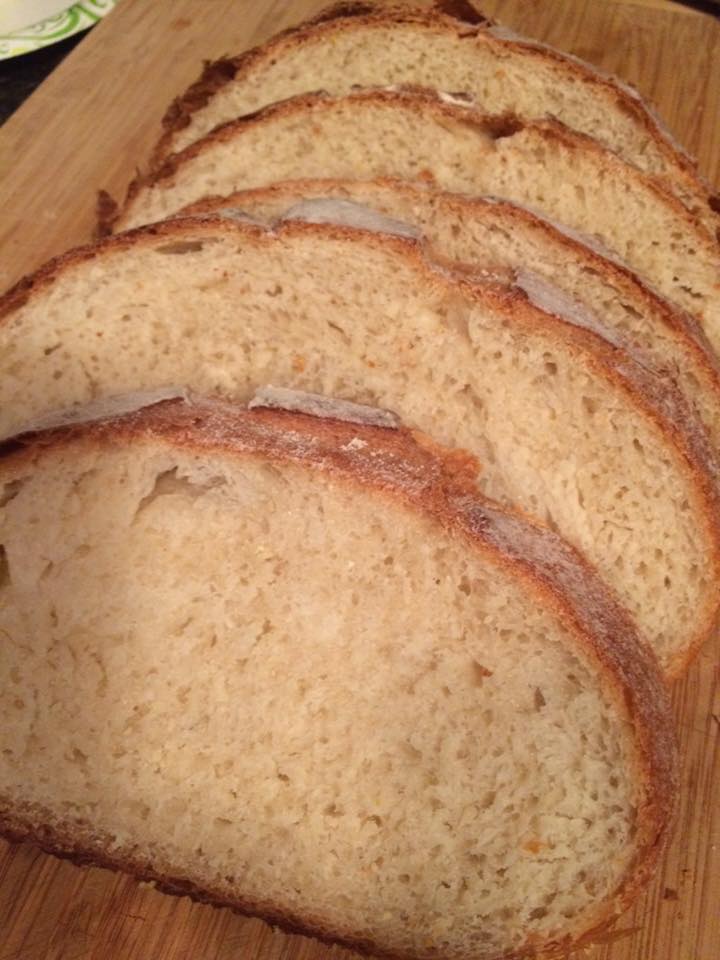
So easy to make and delicious!
Is this bread supposed to have a crispy crust? Mine looked like it should have been crispy/crunchy but it was not. It still tasted great, just wasn’t what I was expecting. If it is supposed to be, what might I have done wrong?
This recipe is so simple, and delicious !
My husband and Son devoured it.
Making more soon.
Thank you.
This was delicious! I only mixed for a few minutes. Forgot to spray water when I put it jn the oven; but sprayed 2 other times. Was done in 20 minutes. Awesome!
Can you bake this in a cast iron dutch oven?
Hi Anne! We haven’t tried to make this with a cast iron dutch oven before, but one of our commenters tried it and said this:
“Instead, when I preheated the oven, I placed my enameled cast iron dutch oven, uncovered inside. Once the oven was preheated, I removed the dutch oven and placed the dough inside, covered it and put it back in the oven. After 20 minutes, I removed the cover and continued baking it for 15 minutes more. This gave it an extra thick crispy crust. The crumb was light, and moist.”
You can also try our No-Knead Amish Friendship Bread, which uses a cast iron dutch oven: https://www.friendshipbreadkitchen.com/amish-friendship-bread-no-knead-sourdough-bread/
I have made this bread many times and LOVE the flavor and texture. However, my crust is always very dark (looks like it is really over baked or starting to burn). Any suggestion?
Hi Erin! One of the biggest causes of overcooking on the outside that we’ve found is that the oven’s temperature gauge is not reading correctly. Your oven could possible be hotter than it’s saying it is, which is why the outside may be getting darker than you’d prefer. We’d recommend getting a thermometer that you can put inside the oven to make sure that it’s the correct temperature. Let us know if we can help with anything else!
Also, the notes say to use the starter before adding the flour milk and sugar, but if you do this, how do you keep a starter going?
Thank you!
After day 6’s feeding, you should have more than a cup of starter to work with (usually there is anywhere from 2-3 cups). This means that you should be able to take a cup of starter for this recipe and have at least a cup to feed the next day! Let us know if you have any more questions, Alexis! Happy baking!
Ok, so after day 6, take a cup and make this recipe. Then the next day add a cup and a half each of flour sugar and milk?
Thank you
You could take a cup after day 6 or you could wait till day 9 to take a cup to bake with (which is what the notes are suggesting), but I would still just wait to day 10 to feed it again. Does that make sense?
I am wondering if it’s ok to use a metal bowl and metal hook on the stand mixer? The traditional AFB recipe says to use non-metal bowl and spoon. So wondering if it’s ok to use metal for this recipe?
Thanks!
Hi Alexis! Yes, that should be totally fine! As long as your metal utensils and bowls are stainless steel or coated, like most utensils are bowls are nowadays, you’ll be fine. (And most stand mixers are stainless steel!)
Hi, Has anyone made this in a bread machine? Looking to use my friendship starter for breads in the machine.
Made this bread this weekend- mine only required ~4C of flour? Turned out AMAZING, though! Making it again today in bread pans for sandwiches. YUM!
So glad you enjoyed the recipe, Tiffany!
I’m confused about the total rising time. Are there 3 rises (1.5 hrs, 1 hr, 1hr), or just two (1.5 hrs, 1hr). Thank you!
Hi Meesa! There are only 2 rises, the 1.5 and 1 hr rises. Happy Baking!
Darien, I am so enjoying the Crusty Artisan Bread and have a successful starter thanks to your instructions. I have failed a few times but where I was initially frustrated and half of me wanted to give up, I took a break and then pressed on. It helps knowing the little tips and visuals. Knowing the feel I am looking for and the difference in the yeast verses the starter rising helps tremendously. Now the bread is edible!
Thanks again,
Gin
Hi Gin! We’re so glad you persevered and got the recipe to work for you!! We say this a lot, but using sourdough (any kind of sourdough including Amish Friendship Bread) is not easy! It takes time and patience to learn what works for your kitchen and what doesn’t. Thanks for sharing!!
On day 10 you make this bread using 1 cup of starter before adding the flour, milk and sugar. What do you do with the remaking starter in the bag? Do you still add the 3 ingredients even though there is a cup taken out?
Hi Julie! Here’s the instructions for day 10: https://www.friendshipbreadkitchen.com/amish-friendship-bread/
You are going to add the flour, sugar, and milk before you separate the cup to bake!
Baked this 2x it is a delicious moist bread with a crisp crust.
So glad you enjoyed it, Sandra! Isn’t that the best?
Hi,
Curious which type of flour to use-all purpose or bread flour? Thank you!
Hi Marie! For this recipe, we’ve used all-purpose bread. However, bread flour would most likely work, as well! Have fun!
Do you use the starter like the day you received it or do you go through the process of adding the friendship bread ingredients to the starter (1c flour, 1c sugar, 1c milk)… also I do not have a stand mixer. What would I do instead? Very 1st time making bread
Hi Stephanie! You can bake with the starter if they give it to you on their day 10, but we usually recommend treating your starter as if it’s day 1. Here’s the instructions for the next 10 days: https://www.friendshipbreadkitchen.com/amish-friendship-bread/
Well, this is delicious. I followed the recipe completely, until it came time to bake it. Instead, when I preheated the oven, I placed my enameled cast iron dutch oven, uncovered inside. Once the oven was preheated, I removed the dutch oven and placed the dough inside, covered it and put it back in the oven. After 20 minutes, I removed the cover and continued baking it for 15 minutes more. This gave it an extra thick crispy crust. The crumb was light, and moist.
I’ve been working with a sourdough starter for a couple of years now, using it to make bread and pizza dough. I still have a lot to learn, but love the process of changing flour combinations and hydration levels.
Hello, I have not tried this recipe before and will be making it very soon. I am not an experienced sourdough bread baker, but look forward to working on that.
I haven’t tried this recipe but I’m thinking about it. I have a traditional starter but I never get a great rise. The taste is good, but does not rise much. My house may be too cold? Anyway, I think I may try this one and see if I have better success.
I made this dough without adding the yeast. I hand mixed and and kneaded it, then let it rise for about 20 hours. I kneaded it again and left it overnight. I should have shaped it and baked it at about 6-8 hours, but I was at work and didn’t see it! However, I knocked it back down a bit and shaped it hours later. I was afraid it had overproved. But once it came out of the oven, I was very impressed! My husband loved the flavor and was actually near tears as he tasted it. (ha!!) It is slightly sweet but very versatile. I also made the Rustic Sourdough bread. Comparatively, we liked this “artisan” recipe more. The Rustic Sourdough took much longer to rise, and – although it has a beautiful shape as a boule – is a denser, more “flour-y” bread. I didn’t add the sugar on that, but my husband missed the sweetness he had previously experienced. I do think the Rustic would make a very good sandwich bread for people who really want a very solid bread.
I love making bread and baking. It hard to come up with anything but pancakes as a bread exchange as I’m trying to cut back or eliminate carbs from my diet.
What type of yeast should be added? Instant or the dry one?
Hi Savannah — for this recipe you can actually use either since it’s being added to the starter mixture — I think Heidi used active since she made a note in step 2 to let it sit for five minutes which is what you would generally do for active. Active usually needs to be dissolved in water before using but instant/rapid-rise can go straight in. Hope this helps!
Can’t wait to make this for my village neighbors for Christmas
The recipe does not mention kneeding the dough. Is no kneeding needed? Or am I to kneed it when I add it to the flour work surface?
I followed the recipe exactly – no kneading – and the bread turned out wonderful! I made one loaf in a well-greased and well-floured bread pan – perfect for sandwiches and breakfast toast. My family of six loved it. When I was first given the starter, I groaned. I didn’t need a lot of oil-heavy, sweet breads. But now that I have this delicious and EASY sandwich bread recipe, I’m gonna keep the starter and hope to incorporate bread making into my weekly schedule! I will also try experimenting with different whole wheat to all purpose flour ratios.
I was excited to try to make a sandwich bread. Unfortunately the bread is about 2″ at the center and about 1/2″ at the edges. The dough was very sticky but at least doubled on the first rise and again on the second. Like previous comment, my dough spread out on second rise and then stayed pretty flat. Also it stuck firmly to the pan. I had to chisel it off! Should I have greased the pan? Should I have shaped the loaves differently? It tastes good but the crust is not crisp. I did spray the oven with water. Thanks for any help.
Just made this again. After placing on the pan for the second rise, the dough spread out and ended up touching the other. So i Just went ahead and baked it and it stayed sort of flat. Should I have reshaped them into a tighter ball before baking even though I did do that after cutting the dough in half and placing on the sheet. I think I will try baking in a bread pan next time. Thanks for your help and all the WONDERFUL recipes.
This is the second time I am making this bread, and it is a keeper! I made it at Thanksgiving with great reviews and am again making for Christmas. Great chew and texture. Beautiful colored bread.
I made this bread using the potato flake starter, and I used it after feeding the starter. It was delicious.
Just a note: if you are confident you have a good yeast going with your starter, you can omit adding more. Also, instead of the hassle of spraying over and over in the oven, just put a pan on the bottom shelf before you turn the oven on, then add 1/2-1 cup of water at the beginning of baking and close the door quickly. This is the traditional way to get a proper french boule crust. You should hear the bread ‘sing’ when you take it out!
Thank you for your suggestion to use a pan of water in the bottom of the oven to get that gorgeous crust…it worked! Electric ovens really don’t like ice cubes thrown into them as I have read in many bread recipes. (I learned this the hard way.) I didn’t want to spray water either. I have been baking our bread for many years and my family has always preferred rustic types. Everyone flipped over this bread & the crust is amazing. I can’t thank you enough for this tip.
Yes, you can do that with any boule type recipe. Wetter doughs may stick to your pan though but this one looks good.
I have made this delicious bread several times and my 28 year old daughter says she wants me to make it when she opens her “dream deli”. I’ll probably be six feet under by then, but I’ll be sure to pass along the recipe. =)
I love to make this!
Tip: be prepared for how long the bread actually takes due to rise time.
Love friendship bread…delicious…can you order this?
Connie,
Thanks for the nice comment! Order the bread? Or the starter?
Heidi